Part B: Build & Test
Table of contents
- Part B: Build & Test
- Overview
- Key Concepts You’ll Learn
- Workflow Components Reference
- Step 1: Create a New Workflow
- Step 2: Gmail Trigger Setup
- Step 3: Email Data Preparation
- Step 4: AI Classification Node
- Step 5: First Edit Fields Node
- Step 6: Routing with Switch Node
- Step 7: Gmail Label Application
- Step 8: Second Edit Fields Node
- Step 9: Logging to Google Sheets
- Step 10: Test & Activate Your Workflow
- Next Steps
- Push Your Workflow to GitHub
- Download Complete Workflow
Overview
The Universal Pattern You’re Learning
This Isn’t Just About Email: You’re learning a fundamental automation archetype: Intelligent Triage & Routing. This pattern applies to ANY incoming data stream that needs classification and different handling based on its characteristics.
The pattern has four core components:
- Data Ingestion (Gmail Trigger) → Could be webhooks, forms, APIs, databases
- AI Classification (LLM Chain) → Categorise based on ANY criteria you define
- Intelligent Routing (Switch) → Send different types to different processes
- Action & Logging (Labels/Sheets) → Could be tickets, alerts, workflows, databases
Real-World Applications of This Pattern
Customer Support System:
- Input: Support tickets via API
- Classification: Bug report, feature request, complaint, praise
- Actions: Create Jira ticket, alert product team, route to senior support, send to marketing
Error Log Monitor:
- Input: Application logs from CloudWatch
- Classification: Critical, warning, info, debug
- Actions: Page on-call engineer, create incident, log to database, ignore
Social Media Monitor:
- Input: Twitter/LinkedIn mentions
- Classification: Customer complaint, sales lead, PR crisis, positive feedback
- Actions: Alert PR team, add to CRM, escalate to legal, share with team
Document Processing:
- Input: Uploaded invoices/receipts
- Classification: Expense type, department, approval needed
- Actions: Route for approval, auto-approve small amounts, flag anomalies
Why Email? We use email classification as our example because everyone understands email. But once you grasp this pattern, you can apply it to any data stream in your organisation.
Now we’ll build this pattern step-by-step, and you’ll see how easily each component can be swapped for your specific use case.
Key Concepts You’ll Learn
Before diving into the build, let’s understand the fundamental concepts that make this pattern powerful:
1. What is Dynamic Routing? (Intelligent Triage)
Think of this like a hospital emergency room triage system:
The Core Pattern: Not all incoming data needs the same treatment
- Some emails need immediate action (like bugs or angry customers)
- Some need standard handling (like questions or requests)
- Some can wait (like newsletters or FYI messages)
Dynamic routing means the system automatically decides where each item goes based on its characteristics. This is also called:
- Intelligent Triage (healthcare)
- Smart Dispatch (logistics)
- Conditional Routing (programming)
- Content-Based Routing (messaging systems)
2. Why Break Problems into Stages (The ETL Pattern)
Instead of one massive workflow doing everything, we’re using the ETL approach (Extract, Transform, Load):
Four Distinct Stages:
- Data Ingestion - Get the email (Extract)
- AI Classification - Understand what it is (Transform)
- Intelligent Routing - Send to the right place (Route)
- Action & Logging - Do something and track it (Load)
Why separate stages? The power of modularity:
- ✅ Easier to debug: Issue with classification? Only check stage 2.
- ✅ Reusable components: Swap Gmail for webhooks, emails for support tickets
- ✅ Maintainable: Change how you handle urgent emails without touching classification
- ✅ Testable: Test each stage independently before connecting them
This is the same principle behind data pipelines, microservices, and Unix philosophy!
3. How Classification & Routing Works (The Mechanism)
The magic happens in two steps:
Step 1: AI Classification
- AI reads the email and understands context
- Returns structured data:
{priority: "urgent", confidence: 95%}- This isn’t just “tagging” - it’s intelligent analysis
Step 2: Switch Node Routing
- Takes the classification result
- Evaluates rules: “If priority = urgent, go to Output 1”
- Sends data down different paths based on rules
Why this architecture? Separating “decision making” (AI) from “rule execution” (Switch) makes the system more maintainable. Change classification criteria? Edit AI prompt. Change routing rules? Edit Switch node.
4. Why OpenRouter for This Exercise
Model Provider Strategy:
Exercise 1 (Today): OpenRouter for model exploration
- Access to 100+ models (Llama, Mistral, Qwen, GPT, Claude, Gemini)
- Experiment easily - find what works for your use case
- Compare quality vs cost - small models for simple tasks, big models for complex ones
- Competitive pricing - often cheaper than direct API access
Exercise 2 & 3 (Later): Google Gemini for production speed
The modularity lesson: Switching providers is just changing one node. The pattern (Ingest → Classify → Route → Act) works with ANY model provider!
5. The Universal Pattern (Beyond Email)
What You’re Really Learning:
This isn’t just email classification. You’re learning a pattern that applies to ANY data stream that needs intelligent handling:
- Customer support: Classify tickets → Route to departments → Auto-respond or escalate
- Error monitoring: Classify severity → Route to teams → Page engineers or log
- Document processing: Classify doc type → Route to workflows → Extract data or request review
- Social media: Classify sentiment → Route to teams → Respond or escalate
The pattern stays the same: Ingest → Classify → Route → Act. Only the data source and actions change!
Workflow Components Reference
Here’s a quick reference of all the nodes you’ll build in this exercise:
| Node Type | Purpose | Configuration |
|---|---|---|
| Gmail Trigger | Monitor inbox for new emails | Poll interval: every minute, Event: Message Received |
| Code (Prepare Email) | Extract and clean email data | Extract sender, subject, body; remove signatures/quotes |
| Basic LLM Chain | AI-powered email classification | Structured output parser, classification prompt, OpenRouter model |
| Edit Fields (Extract Results) | Extract AI classification fields | Priority, confidence, reasoning, sender, subject, messageId |
| Switch (Route by Priority) | Route based on priority level | Rules: urgent → Output 1, high → Output 2, others → fallback |
| Gmail (Add Labels) | Apply priority labels to emails | Add URGENT-SUPPORT or HIGH-PRIORITY labels |
| No Operation | Skip labelling for standard emails | Pass-through for low/medium priority emails |
| Edit Fields (Consolidate) | Merge all data for logging | Combine email metadata with classification results |
| Google Sheets | Log all classifications | Append or update rows based on messageId |
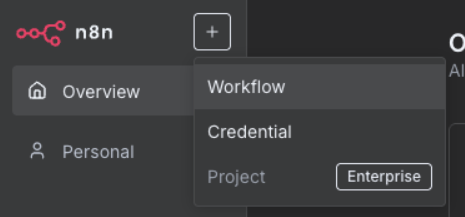
Step 1: Create a New Workflow
1.1 Set Up Your Canvas
- Click “Add workflow” in your workspace
- Name it: “Email Classification & Routing”
-
Click “Create”
Canvas navigation: Click and drag to move around, scroll to zoom, right-click for options
Step 2: Gmail Trigger Setup
2.1 Configure Email Detection
What’s a Trigger? Triggers are special nodes that start workflows automatically when something happens (like receiving an email). They’re different from regular nodes because they “listen” for events rather than processing data.
-
Click the plus button in the top right corner to open the nodes panel
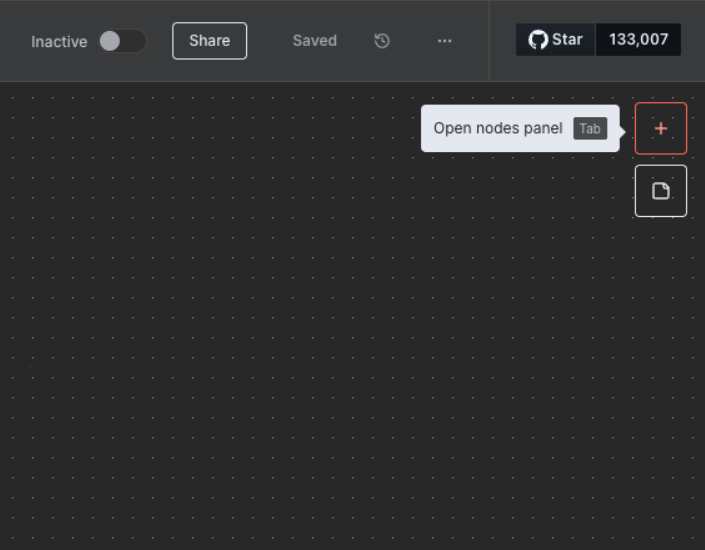
-
Search for “Gmail” in the search box
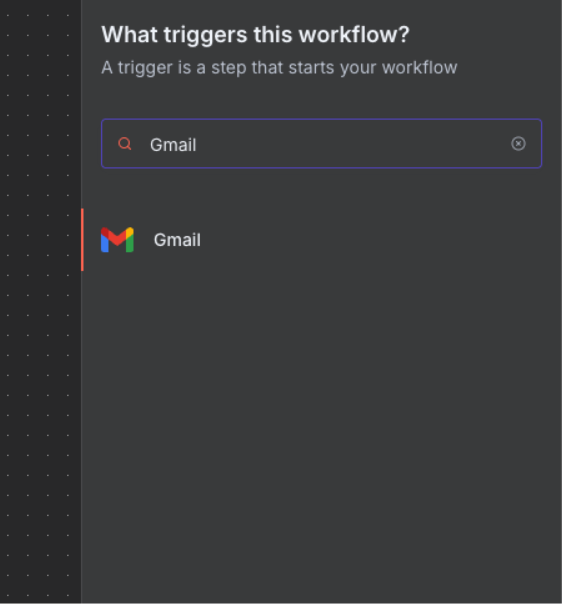
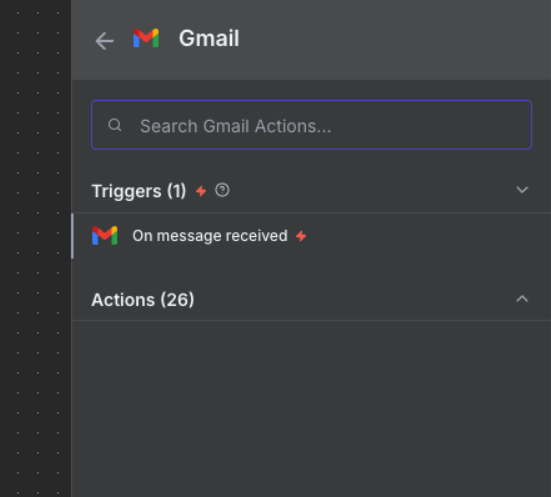
-
Select “On message received” trigger
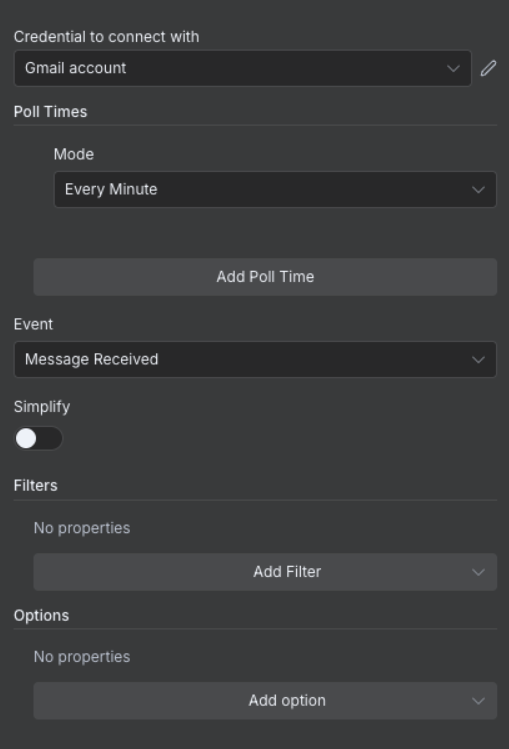
- Configure trigger settings:
- Credential: Select the credential we created earlier
- Poll Time: Every Minute
- Event: “Message Received”
- Simplify Output: Toggle OFF
- Test the trigger:
- Click “Fetch Test Event”
- Click “Listen for Event”
- Send a test email to yourself
- Wait for it to appear in n8n
Success: You should see your test email data in the output panel
Step 3: Email Data Preparation
3.1 Extract and Clean Email Content
Why Use a Code Node? While n8n has built-in nodes for many tasks, the Code node gives you flexibility to transform data exactly how you need it. It’s perfect for cleaning text, extracting specific fields, and preparing data for AI processing.
- Add “Code” node after Gmail Trigger (click the + on the connection)
- Name it: “Code” (or “Prepare Email for AI”)
- Configure:
- Mode: “Run Once for Each Item”
- Language: “Javascript”
- Add this code:
1
2
3
4
5
6
7
8
9
10
11
12
13
14
15
16
17
18
19
20
21
22
23
// Extract and clean email data
const emailData = {
  sender: $input.item.json.from.value[0].address,
  senderName: $input.item.json.from.value[0].name || 'Unknown',
  subject: $input.item.json.subject,
  body: $input.item.json.text || $input.item.json.snippet,
  receivedDate: $input.item.json.date,
  messageId: $input.item.json.id,
  threadId: $input.item.json.threadId
};

// Clean body text (remove signatures, quotes)
emailData.cleanBody = emailData.body
  .split(/\r?\n-- \r?\n/)[0]  // Remove signature
  .split(/On .+ wrote:/)[0]    // Remove quoted text
  .trim();

// Truncate for API limits (first 1000 chars)
emailData.truncatedBody = emailData.cleanBody.substring(0, 1000);

return {
  json: emailData
};
Why clean the data? AI models work better with clean, focussed text without signatures or quoted content.
Step 4: AI Classification Node
4.1 Configure the AI Model
Understanding LLM Chains: The Basic LLM Chain combines three components: an output parser (to structure the response), a prompt (your instructions), and a language model (the AI). We configure them in this order because defining the output structure first helps write better prompts, and the model selection comes last as it’s often interchangeable.
- Add “Basic LLM Chain” node (under AI nodes)
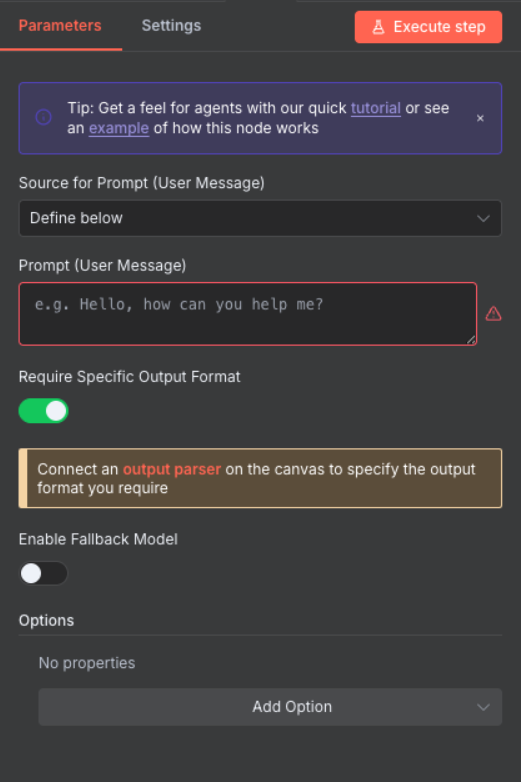
- Configure initial settings:
- Source for Prompt: “Define below”
- Require Specific Output Format: Toggle ON
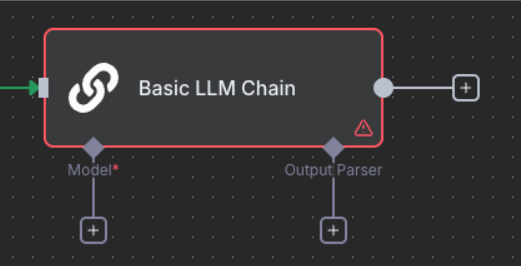
- Now we’ll configure the three components in logical order: Output Parser → Prompt → Model
4.2 Define Output Structure (Parser)
Why Output Parser First? Structured output is crucial for automation. JSON schemas ensure AI responses are predictable, parseable, and can integrate with databases, APIs, and downstream processes. Without structured output, you’d need complex text parsing that breaks easily.
-
Click the “+” under Output Parser
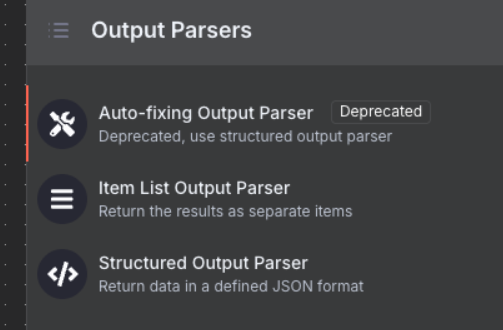
- Select “Structured Output Parser”
- Configure the schema:
- Schema Type: Manual
- Input Schema: Add this JSON Schema:
1
2
3
4
5
6
7
8
9
10
11
12
13
14
15
16
17
18
19
20
21
{
  "schema": "https://json-schema.org/draft/2020-12/schema",
  "type": "object",
  "properties": {
    "priority": {
      "type": "string",
      "enum": ["urgent", "high", "medium", "low"]
    },
    "actionRequired": {
      "type": "boolean"
    },
    "confidence": {
      "type": "number"
    },
    "reasoning": {
      "type": "string"
    }
  },
  "required": ["priority", "actionRequired", "confidence", "reasoning"],
  "additionalProperties": false
}
Schema Benefits: This structure guarantees the AI returns data your Switch node can read. The schema acts as a contract between the AI and your workflow, preventing errors from unexpected response formats.
4.3 Write the Prompt
Now that we’ve defined what output we expect, we can write a prompt that produces it.
In the Basic LLM Chain node, enter this prompt in the “Prompt” text field:
1
2
3
4
5
6
7
8
9
Email from: {{ $json.senderName }} <{{ $json.sender }}>
Subject: {{ $json.subject }}
Body: {{ $json.truncatedBody }}

Classify as:
1. Priority: "urgent" | "high" | "medium" | "low"
2. Action Required: true | false
3. Confidence Score: 0.0-1.0
4. Reasoning: Brief explanation of classification
Critical: Copy this prompt exactly as shown above, including the spaces inside ``. These field references pull data from the “Prepare Email for AI” node. The prompt should appear in n8n’s interface with the variable references highlighted in a different colour.
Save API Tokens During Development: After testing the Basic LLM Chain node once, click the pin icon 📌 in the output panel to save the result. This prevents repeated API calls (and token consumption) while you build the rest of your workflow. Remember to unpin before going live!
4.4 Select the AI Model
Finally, we choose which AI model will process our prompt.
-
Click the “+” under Chat Model to see available language models
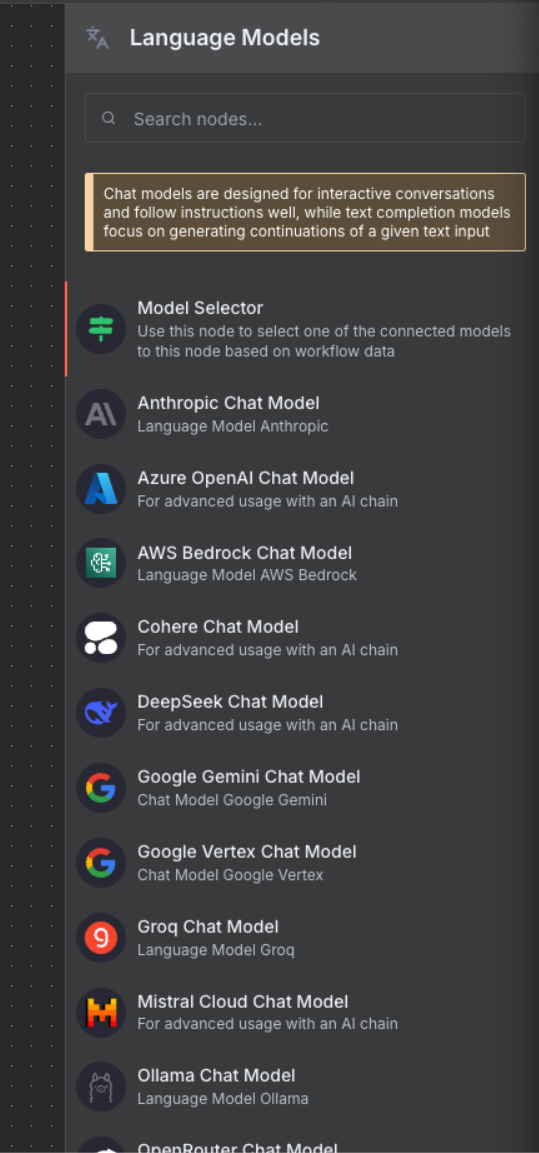
- Select “OpenRouter Chat Model” from the list
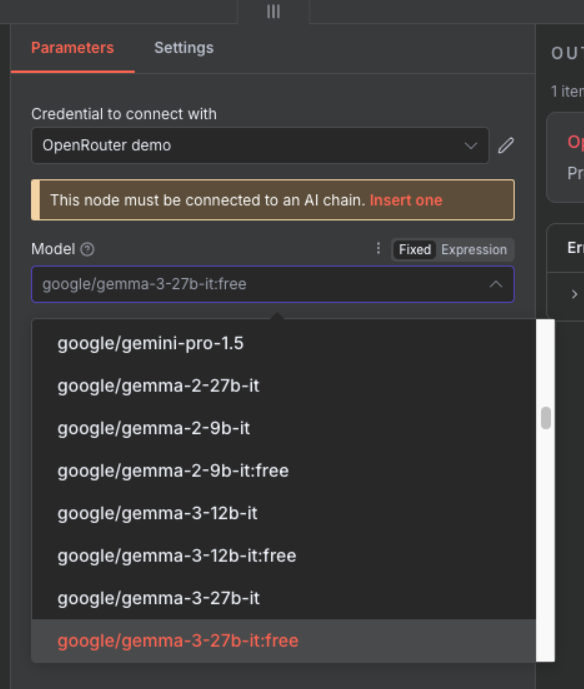
- Configure:
- Credential: Choose the OpenRouter credential
- Model: Select “google/gemma-3-27b-it:free”
Why Model Last? The beauty of this setup is model flexibility. You can easily swap between GPT-4, Claude, Gemma, or any other model without changing your prompt or output structure. Start with free models for testing, upgrade to premium models for production.
Step 5: First Edit Fields Node
5.1 Extract AI Classification Results
Edit Fields Node: This node extracts and prepares data for routing. We’ll create a clean dataset with just the fields we need.
- Add “Edit Fields” node after Basic LLM Chain
- Configure:
- Assignments Mode: Manual
- Add these fields:
priority→{{ $json.output.priority }}(Type: String)confidence→{{ $json.output.confidence }}(Type: Number)reasoning→{{ $json.output.reasoning }}(Type: String)sender→{{ $('Prepare Email for AI').item.json.sender }}(Type: String)subject→{{ $('Prepare Email for AI').item.json.subject }}(Type: String)messageId→{{ $('Prepare Email for AI').item.json.messageId }}(Type: String)
Step 6: Routing with Switch Node
6.1 Create Priority-Based Routing
Simplified Routing: We’re focusing on the most important emails - urgent and high priority. Everything else goes to standard processing.
- Add “Switch” node after Edit Fields
- Name it: “Route by Priority”
- Configure:
- Mode: “Rules”
- Fallback Output: “Extra Output”
- Add routing rules:
Output 1 - Urgent Support:
- Left Value:
{{ $json.priority }} - Operator: equals
- Right Value:
urgent - Rename Output: “Urgent Support”
Output 2 - High Priority:
- Left Value:
{{ $json.priority }} - Operator: equals
- Right Value:
high - Rename Output: “High Priority”
Step 7: Gmail Label Application
7.1 Apply Priority Labels
Label Strategy: We’ll apply labels to urgent and high-priority emails. Standard emails can use a “No Operation” node to skip labelling.
Prerequisites - Create Labels in Gmail:
- Open Gmail in your browser
- Click the gear icon → “See all settings”
- Go to “Labels” tab
- Create these labels:
- URGENT-SUPPORT
- HIGH-PRIORITY
Configure Gmail Nodes in n8n:
For Urgent Support Output:
- Add “Gmail” node connected to “Urgent Support” output
- Name it: “Add label to message”
- Configure:
-
Operation: “Add Labels”
-
Message ID:
{{ $('Edit Fields').item.json.messageId }} -
Labels: Select “URGENT-SUPPORT”
-
For High Priority Output:
- Add “Gmail” node connected to “High Priority” output
- Name it: “Add label to message1”
- Configure:
-
Operation: “Add Labels”
-
Message ID:
{{ $('Edit Fields').item.json.messageId }} -
Labels: Select “HIGH-PRIORITY”
-
For Fallback (Extra) Output:
- Add “No Operation, do nothing” node
- Connect to the “extra” output
- This skips labelling for standard emails
Step 8: Second Edit Fields Node
8.1 Consolidate All Data for Logging
Data Consolidation: This second Edit Fields node combines all email metadata with AI classification results before sending to Google Sheets.
- Add another “Edit Fields” node
- Name it: “Edit Fields1”
- Connect both Gmail nodes to this Edit Fields node
- Configure these field assignments:
Core Fields:
messageId→{{ $('Edit Fields').item.json.messageId }}(Type: String)threadId→{{ $json.threadId }}(Type: String)receivedDate→{{ $('Prepare Email for AI').item.json.receivedDate }}(Type: String)sender→{{ $('Prepare Email for AI').item.json.sender }}(Type: String)senderName→{{ $('Prepare Email for AI').item.json.senderName }}(Type: String)subject→{{ $('Prepare Email for AI').item.json.subject }}(Type: String)processed_date→{{ DateTime.now().toISO() }}(Type: String)
Classification Fields:
priority→{{ $('Edit Fields').item.json.priority }}(Type: String)confidence→{{ $('Edit Fields').item.json.confidence }}(Type: Number)reasoning→{{ $('Edit Fields').item.json.reasoning }}(Type: String)
Why Edit Fields? This node consolidates all data paths from the Switch node into a single stream for Google Sheets. This is crucial for API optimisation - instead of making multiple Google Sheets API calls from different branches, we make just one call per email processed.
Step 9: Logging to Google Sheets
9.1 Create Analytics Dashboard
Google Sheets as a Database: For simple automation projects, Google Sheets acts as a free, visual database. It’s perfect for logging, analytics, and sharing data with non-technical stakeholders who are comfortable with spreadsheets.
First, prepare your Google Sheet:
- Go to Google Sheets
- Create a new spreadsheet named “Email Classification Log”
- In the first row, add these column headers:
- messageId
- threadId
- receivedDate
- sender
- senderName
- subject
- processed_date
- priority
- confidence
- reasoning
Then configure the Google Sheets node in n8n:
- Add “Google Sheets” node connected to “Edit Fields1” node
- Name it: “Append or update row in sheet”
- When prompted, connect your Google account
- Configure the node:
- Operation: “Append or Update”
- Document: Select “Email Classification Log” from dropdown
- Sheet: “Sheet1”
- Columns:
- Mapping Mode: “Auto-Map Input Data”
- Matching Columns:
messageId(prevents duplicate entries)
- The schema will auto-populate from your sheet headers
Auto-Mapping: Since we prepared all fields in the Edit Fields node with matching column names, Google Sheets will automatically map them to the correct columns.
API Rate Limits: Google Sheets has quota limits (300 requests per minute for free accounts). By consolidating all paths through Edit Fields into a single Google Sheets node, we ensure only one API call per email, preventing rate limit errors even during high email volumes.
Step 10: Test & Activate Your Workflow
10.1 Test Your Workflow
- Click “Test Workflow” button in n8n
- Send yourself a test email with a clear subject like “URGENT: Test message”
- Wait for the workflow to execute (it checks Gmail every minute)
- Verify:
- The email received the correct Gmail label
- Data appeared in your Google Sheets log
10.2 Go Live
Once your test succeeds:
- Toggle the “Active” switch in the top-right corner of the workflow canvas
- Save the workflow (Ctrl/Cmd + S)
Your workflow is now live and will automatically:
- Check Gmail every minute for new emails
- Classify each email using AI
- Apply appropriate labels
- Log all classifications to Google Sheets
Next Steps
Workflow complete! You’ve successfully:
- ✅ Built an email classification system
- ✅ Integrated AI for intelligent routing
- ✅ Tested with real emails
- ✅ Activated automatic processing
10.3 What You’ve Really Learned
More importantly, you’ve mastered the Intelligent Triage & Routing pattern. You now know how to:
- Ingest data from any source (not just email)
- Classify it using AI based on custom criteria
- Route different types to different handling processes
- Log everything for analytics and compliance
Your Turn: Think about your work or studies. What repetitive classification task could you automate using this pattern? Customer feedback? Bug reports? Document sorting? The same workflow structure applies - just swap the nodes!
Push Your Workflow to GitHub
10.4 Export and Save Your Work
Now that you’ve built your workflow, it’s important to save it to your GitHub repository. This creates a backup and allows you to track changes over time.
10.4.1 Export Your Workflow from n8n
- In your n8n workflow canvas, click the three-dot menu (⋮) in the top-right corner
- Select “Download” or “Export workflow”
- Save the JSON file to your computer with a descriptive name:
- Example:
email-classification-workflow.json
- Example:
Tip: The exported file contains your entire workflow structure, but credentials are not included for security reasons.
10.4.2 Upload to GitHub via UI
- Navigate to your GitHub repository in your web browser
- Go to the workflows folder (or create one if it doesn’t exist):
- Click “Add file” → “Create new file”
- Type
workflows/in the filename field to create the folder
- Upload your workflow:
- Click “Add file” → “Upload files”
- Drag and drop your exported JSON file, or click to browse
- Alternatively, click “Create new file” and paste the JSON content
- Commit your changes:
- Add a commit message:
Add Email Classification workflow - Choose “Commit directly to the main branch” or create a new branch
- Click “Commit changes”
- Add a commit message:
Success! Your workflow is now safely stored in GitHub and can be shared with others or imported into a different n8n instance.
Download Complete Workflow
10.5 Import Pre-Built Template
Save time by importing our complete workflow:
- Download the workflow JSON file:
- Import into n8n:
- Open n8n
- Click “Workflows” → “Import”
- Select the downloaded JSON file
- Click “Import”
- Update credentials:
- Gmail OAuth2 connection
- OpenRouter API key
- Google Sheets OAuth2 connection
- Update label IDs:
- Check your Gmail label IDs
- Update in each Gmail node
Important: The imported workflow uses placeholder credentials. You must update them with your own before testing.
Ready for more? Try the Challenge Tasks →